
Solving Cooling System Problems
Now let’s talk a bit about how to solve an overheating issue.
The #1 cause of overheating is air in the cooling system. I say this from 20 years of experience as a technician. There are many causes of air getting into the cooling system, and finding the cause will be the key to solving the issue for good.
Browse Recommended Tools & Supplies For This Build
What I see most often when it comes to air in the cooling system is an overheat that occurs after the vehicle has had a bunch of work done that involved opening up the cooling system. Some common symptoms of air in the cooling system include:
- You or a garage just finished replacing a head gasket, water pump, intake gasket, radiator, heater core, or coolant hose, and now that the work is done, you have an overheat condition.
- You have a condition where the vehicle starts to overheat, then suddenly drops to normal.
- You have issues getting consistent heat from the vents.
- Your idle fluctuates up and down and will not level out.
These are all classic symptoms of air in the cooling system. What happens is an air pocket gets trapped somewhere in the system, and does not allow the coolant to flow properly. When this happens, it creates a steam pocket that does not allow coolant flow; hence, the overheat. When the air pocket moves and things begin to cool down, things go back to normal for a while until the air accumulates again. The process continues until you purge the air from the system.
Any time you open a cooling system for service, you must purge the air from the system. If you don’t, you get an air pocket and the symptoms described above.
Bleeding a cooling system is fairly simple. It’s handled differently depending on whether you have a system with an overflow or expansion tank. I’ll first cover a system that does not use an expansion tank and just has an overflow bottle.
I made this video some time back on the procedure for bleeding a cooling system on a 90s Honda Accord. This engine has a bleeder valve. Not all vehicles have this, and that’s OK. You don’t need the bleeder valve to purge the air from the system. Service procedures vary between makes and models, but in my experience, the bleeder valve is there to make filling the system easier, not necessarily to bleed the air from the system.
You can purchase the spill-free funnel at JBToolSales.com
*Remember that you don’t need a bleeder valve to do this. If you don’t have a bleeder valve, don’t worry; just follow all the other steps outlined in the video and you should be able to purge the air from the system.

You’ll notice in the video that I open the bleeder when first filling the system, and once that’s done, I close it off and I don’t open it again after that point. If I didn’t open the bleeder valve as I filled the system, it would take longer to fill and you’d notice that the air would work its way past the incoming coolant by bubbling out as you filled the system. “Bloop, bloop… bloop.” Instead, you hear the hissing noise of the air escaping from the bleeder valve as it’s displaced by the incoming coolant.
If you don’t have a bleeder valve and you wish you did, you can remove one of the small coolant lines going to the idle control valve or other small hose toward the top of the engine. The key here is to find a line placed high on the engine. This will maximize the effect. Removing a small coolant line will have the same effect as an open bleeder valve would.
If the system has an expansion tank, you do things a little differently. Instead of using the spill-free funnel as I did in the video, use the expansion tank itself as the funnel. First, don’t fill it up all the way; this will allow the coolant to expand during the bleeding process.
The coolant level will rise as the engine gets hot, so be prepared for that and wear safety glasses. Do everything else the same.
The only difference in purging the air in an expansion tank system is that you have an expansion tank instead of a radiator cap on a radiator. Watch this video to see how I handled bleeding a cooling system on a vehicle with an expansion tank.
An important note about the bleeding procedure: If the engine starts to overheat during the procedure and the coolant starts bubbling out everywhere, stop. Shut the engine down and let it sit for about 10 minutes. You’ll notice that during that time the coolant level might suddenly drop. This is because the thermostat opened up and is now allowing coolant flow. You can then resume the procedure as outlined in the video.
Lastly, if you have a vehicle that does not use electric fans, it can be difficult to tell when the air has been purged from the system. For these, I normally run the engine for about 10 minutes or so and check the heater output. If the heat is consistent and I have good circulation through the system, I call it a day and move on. Here is a video that shows that procedure.
Tools/Supplies For This Build:
Adjustable elastic headband Adjusts 90 degrees for use anywhere Easy on/off, just twist Super bight LED’s never need replacing Spring...
Complete Combustion Leak Test Kit – Includes Fluid – Nothing More to Buy When Fluid Turns From BLUE to YELLOW...
Most effective way to add A/C dye Compatible with R-134a, R-1234yf and other refrigerants Ideal for high-volume shops Services up...
The Infrared Thermometer is great for checking temperatures of heater vents, AC’s, engines, mufflers, tires, brakes, and more. It measures...
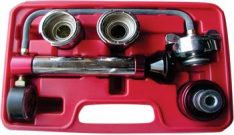
Tests automotive pressurized cooling systems up to 30 PSI Kit includes: Pump with gauge 12” hose and cap adapter to...
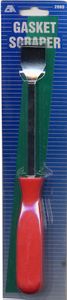
– All purpose heavy-duty scraper removes shellacked gaskets, paint, grease, and carbon – Forged alloy steel blade with sharp chisel...
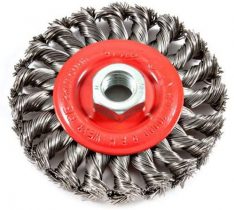
THREADED ARBOR: 5/8”-11 IDEAL FOR heavy-duty cleaning applications and removal of weld scale, spatter and heavy corrosion EASY AND SMOOTH...
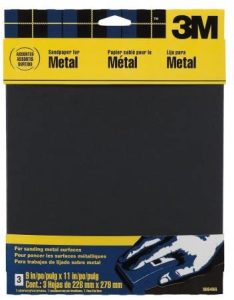
N/A Imported Used mostly for light clean-up before painting Makes a particularly good polishing agent Includes three sheets per pack....