Thanks for your help, @ToyotaKarl, @Hanneman, @Rob913meg, and @grg8888.
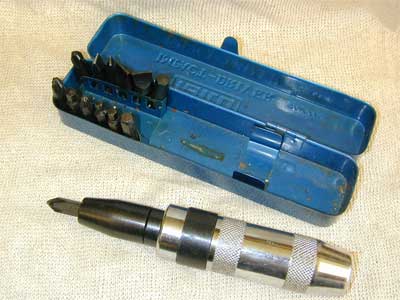
I’m happy to report success. I spent about 40 minutes repeating this routine: hit it with PB Blaster, insert screwdriver and tap gently, wait, attempt to turn. When I tried turning it, I tried both tightening and loosening, which seemed to help, especially since it seemed easier to turn in the tightening direction due to the state of the screw head. Eventually it broke free. At some point I realized the driver bit I was using might actually be smaller than ideal, so I visually tried to find the next largest one, which turned out to be a P2 like you suggested @ToyotaKarl, and that worked better. I also pushed hard as you suggested. I’m not sure what the smaller bit I was using is — it doesn’t have a number on it.
Some notes:
I recommend wearing goggles when doing this — the PB Blaster ricocheted quite a bit.
This immediately sent a stream of rusty PB Blaster running down the plate, so you might want to have something ready to wipe up / contain the stream with. I ended up sandwiching a paper towel under the bottom of the plate, and using another towel to wipe the runoff from the plate after each blast.
Also, the PB Blaster was immediately taking green paint off the license plate numbers when I wiped away the runoff. I’m not sure how that would’ve worked out if the license plate paint had gotten in the runoff and then on the car body.
The panel where the plate attaches on this car appears to be metal, with plastic (nylon?) nuts embedded. Hopefully the PB Blaster didn’t erode whatever the seal is around the nut. I wiped it off with a wet paper towel, but didn’t want to dump water on it and have it go into the screw hole.
I didn’t notice any harm to the paint from PB Blaster. After I got the plate off I rinsed the whole area with wet paper towels.
There were 2 spongy foam pads under the plate. One of them got saturated with PB Blaster. I tried to flush it out with water, but I didn’t get it all out. Maybe soap and water would’ve been more effective? I’m not sure how that piece of foam will hold up now, or if it’s attached by adhesive I don’t know how that’ll hold up.
As you can see here, the 2 screws from the rear plate have different threads:
I temporarily had to use those again and they both felt like they threaded in. (I left the one with the busted-up head quite loose so I’d be able to get ahold of it with pliers or something if need be.) I’m not sure how to figure out the correct thread so I can get new hardware.
[quote=”Rob913meg” post=99146]Take a pair of vice grips and lay them flat on the plate with the jaws centered on the screw head. Push very hard on the jaws toward the plate to push the plate back and grab the outside edge of the screw with the jaws and close the vice grips tight. If you can grab the outside edge of the screw head, turn it, and reposition the vice grips and do it again. I can get most screws that have a head on them out this way.[/quote]
Thanks for the suggestion. I can see how that might work, but I’d be worried about pushing the edges of the plate hard into the paint. Also, in this case I think the screw was tightened down pretty hard, so I’m not sure there would’ve been any room to do that.
[quote=”grg8888″ post=99181]You can sometimes turn these by taking a pair of diagonal cutters and grabbing the head across its widest part. Sometimes you can get a really good grip this way and turn the screw loose.
Otherwise get a small chisel and hammer and tap the bolt counter-clockwise. Or drill a small hole in the center and use an easy-out.[/quote]
Thanks for the suggestions. That first idea sounds like it would’ve been worth a shot. The hammer and chisel idea…like @Rob913meg’s suggestion, I can see how that could work, but I’d be afraid of what it would do to the paint. Re: the third suggestion, I don’t even own a drill, so I was really hoping a chemical solution would work, and thankfully it did.
 Our Address
